Monday, September 5, 2011

How to age a Terra Cotta Pot

Well, it's been forever and a day since I have posted anything. School stared, then preschool, PTO, and the list goes on!
I did this a while ago, but I still wanted to share this. It's a great way to age your plain terracotta  clay pots. This would work on a new one, or even some that you may have laying around your backyard!
Here is what the set looks like. Now, these for some centerpieces at that I did for our church. When they were done, they had some silk flowers in the saucer. We thought that it sort of has a birdbath look to it.
Here is how to get the look:
Get yourself a clay pot. You don't have to add the saucer if you don't want to.
You will need:
1) All Purpose Joint Compound. This stuff is a miracle in a bucket. They are so many things that you can do with this product!
This bucket was from Home Depot for under $7.00
2) Cream paint or any other shade to your liking. Any water based paint would work. Plus you will want some earth tone colors for the aging process.
3)Sea Sponge. Remember when these were all the rage for faux finishing?
4) "Knife" or blade to spread the Joint Compound onto your pot.


First, you want to give your clay pot 1-2 coats of paint. Make sure that you get a nice even coat on. Let this dry...here in AZ that takes about 20 minutes! In this photo, you can see that I would just put the Joint Compound on in certain places on the pot. I used the blade to add the compound and then use a damp sea sponge to lift and give the mud a little more texture.
Now it's time to say goodnight and let this dry until the next day.
If you feel that your "peaks" might be a little too high, take a sanding sponge to knock and smooth this off. Make sure that you do this step outside and wear a mask. 
Drywall dust can be nasty!
Brush on the earth tone colors in a random patter. I made sure that the acrylic paint was watered down a bit so that there was flow to it. And I also tried to keep the color on the "mud."

Time to bust out that sea sponge again! Make sure it is damp also, and blend in the brown color to give it a soft look. You could add a couple of different shades at the stage too. When the browns were about dry, I added a green just with the sea sponge to make it look like moss was growing in certain places.
So there you have a fun and really inexpensive way to age your pots! This gives them a look like there were in a garden for centuries!

Thursday, June 9, 2011

How to attract a Fairy to your backyard...

My daughter is in love with all things Fairy. She has such a great imagination! So I thought that this would be a good way to keep that going. She is always asking questions about Fairies...where do the live? Where do they go to the bathroom, and so-on. So with a few things that I had around the backyard and a couple of Dollar Store supplies, we made our very own Fairy House!

This really has to be about the most fun that we have had in a while. OK, so I admit, I went a little nuts with this one. But I could not stop. It was SO fun to dig through things and come up with things for this Fairy House!

Here is how you want to get started...It would have been cute to build this right at the base of a tree, but I was worried about the elements. Plus I wanted something that she could sit at. I found this old plastic pot in my garden. You could use any container. You just need to make sure that it is large enough to hold a good amount of dirt for your plants. I actually have this hooked up to our drip system, so it will get some water every few days in case the fairy mama forgets to water it.
Make sure that you fill the bottom with a hand full of small rocks for drainage. And add some good potting soil. ( I never have to buy this because we compost)

We had so much fun picking out "miniature" plants. I wanted a couple of things that would trail off the side of the pot. So that is why I got the ivy. But this little beauty works perfect for something small. I headed over to where the succulents were for something small. Doesn't this make the perfect fairy plant or what?

 I am lucky enough to have a brother-in-law that does wood working. He always has scrapes of wood and bark around. He saved a few pieces for me and they worked perfect! You might be able to find scrapes in your own yard. Or a park, the beach, hiking in the woods, or maybe scrapes of wood from your local hardware store. I nailed a couple of piece to the top to form a roof. For the inside, I used wood glue to attach the different levels. I had some extra silk leaves that I hot glued to the roof. 

S loved putting all the decorations around the pot. I got the moss covered rocks from the Dollar Store. We found some miniature wood craft sticks that we used for the picket fence. Gems and stones make up the different paths.

The swing was made from some grape vines that I cut back from the winter. I saved some because I knew that they would be perfect for fairy construction. 
We have tons of shells that we have saved from the beach, and they are just the perfect accessory for building fairy furniture! I used some floral wire to attach the shell to our swing, Some extra silk flowers I had were hot glued to the top for some color.

Garden gazing ball.

Our fairy bed was a hoot to make! We found a small gift box lid. The added some batting and a scrap of fabric for the blanket. The mini-craft sticks make up the headboard. Flowers and beads finish it off.

Shells, flowers and sticks with a sunflower middle make up this sweet kitchen chair!

Little shells make great dishes! We used more craft sticks and shells to make the table. I am loving those little things!

 A chandelier over the table.

 A pedestal sink and a bathtub! We want our Fairy's to be clean! 

 S wanted a light on top of the house so that the Fairy's could find the house!

Let the fun begin! S loves her Fairy house! It's so fun for her to go and check on it every day to see if we have had any visitors! There are a lot of web sites that sell Fairy accessories. So if you feel like you can not come up with your own furniture and other fairy things, you can always order on-line. But for us, it was more fun to create our own with what we had!


Friday, June 3, 2011

Sorting out Summer!

Kids are on summer break here! So it's time to get creative with things to do! I wanted to have a craft station for the kids. I usually keep things in the closet, but this is a fun way to 
have it out to get those creative juices going!
I have seen a few ideas out there for organizing a craft station. But this was super cheap! Almost free!
I got the blue tray from the Dollar Tree. I try to always save and wash small glass jars and the lids. There are so many things that can be used for. So now, when it's time to make a craft, I can just pull this out and they are good to go! I am for sure going to go back and get more the of the glitter glue! You get 10 sticks for a $1! Plus they have a lot of other random crafts things that you can get. Why pay for a summer camp when you can do your own?

Sure, this is not very fancy at all. But the kids liked making it with me! I have a link here:eighteen25
These ladies have given you a print that you can print out yourself and frame it! 
 So cute! I hope that this can give you some ideas of ways to keep your kids busy!

Thursday, June 2, 2011

Another fun teacher gift!

This is super easy and fun! There are a lot of different ways that you can make this. I got the idea from
eighteen25 
If you go to their site, you can download this sign for free!
I took it a step further and added some fun ribbon to the board. Check it out!
I printed it out on card stock. Then I got this clipboard from Wal-Mart for under $2.00. I happened to have some clear contact paper lying around. If not, you can get that at Wal-Mart too for around $5.00. There is always a use for that stuff!
I rounded the corners of the paper so that it would match the clipboard. I then traced the shape on the contact paper and cut it out. I had my son hold that paper very carefully so that it would not move around. You could also tack it in with a glue stick to hold it in place while you add the contact paper. I used an xacto knife to trim it once I had the contact paper on. Use a credit card to burnish it. Then add some fun ties of ribbon to the top to fancy it up! Enjoy!

Wednesday, June 1, 2011

Crayon Teacher Crafts!

Here is another wonderful gift idea for your kids teachers! Or this might be a fun thing to make for their rooms!
I got this idea from:diy-crayon-initials
This is all over the blog world! But I do have a few pointers..
~ Print your initial in Word or other publishing software on card-stock.  Cut out the letter and glue on your crayons. I used mostly "old" crayons, but I did need a few fresh ones for the tips of my letter.
When you are finished, then attach your crayon letter to your card-stock with the teachers name with a glue-stick. This gives you a chance to position it just the way you want with out having to waste paper printing it to get it right in the frame.
~ I got the shadow box from Hobby Lobby with a coupon. It was a light driftwood color. They sold it in black, but it was double the price. If you want black, go with that frame and spend the money. I about pulled all of my hair out painting this black. The glass does not come out, so you have to tape around it.
~You could just use a regular frame, but the shadow box looks really nice!


This was a fun teacher gift! So colorful and a good use of things that you might already have around the house!

Friday, May 27, 2011

Crayon Crafts!

Hello Blogger World!
I am finishing up some teacher gifts this week. And in the process, my little princess want to help! We all have tons of broken crayons all over, so here are a couple of things that you can do with them! Today will be Part 1, and tomorrow I will show what else I am doing with crayons for a teacher gifts.
I am sure that you all have seen how to melt broken crayon in the oven, but how about the microwave??? I had this candy mold (you can pick them up at any craft store). They are perfect because they are plastic. Once the crayon has harden, they just pop out! Easy and super cute!
We sorted the crayons by similar colors. This was a great thing for little hands to do, plus it's a teachable moment! I have a small ceramic crock that we put the broken pieces in. We started with different reds. I microwaved it for about 2 minutes. Keep checking your microwave. Use a oven mitt to remove it.
Be careful!!! It will be very hot!
Pour your first color into each shape. Now, we were just melting a few of each crayon and color at a time. Fill about 1/4 to 1/2 full in your candy mold. Wipe out your microwave safe dish with a paper towel and add the next color of crayon to be melted. this is how you can get a layered look! When that color is melted, add that to your 1st color. By the time we added the 2nd color, the 1st color had already started to harden. Another option is you could use a toothpick to swirl the colors to give it a marbled look. Fun!
We then carefully put them in the freezer. By the time Cinderella was done with lunch, so were the crayons! We made enough crayons to give to the neighbors!
She loved using them on paper and seeing how the different colors came out onto the paper!
Enjoy and more crayon projects to come!

Thursday, March 31, 2011

EGG-xactly!

Hello Blog World!
I know, it's been over two month since I last posted! What has been going on? Lot's of sickness...not on my part, but my kids and hubby! And then there was Spring Break....for 2 weeks! Now, I have been working on tons of projects, it's just this TIME thing that I need to work on!
So I am going to start with a easy spring arrangement that can be made to go just about anywhere!

Are these not so fun?
Here is how to make them:
First, you need a box of cute little eggs. I scored with these babies! I got them for .50 a box at a garage sale, but I know that you can get them at Hobby Lobby or other craft stores. Don't forget to use coupons!
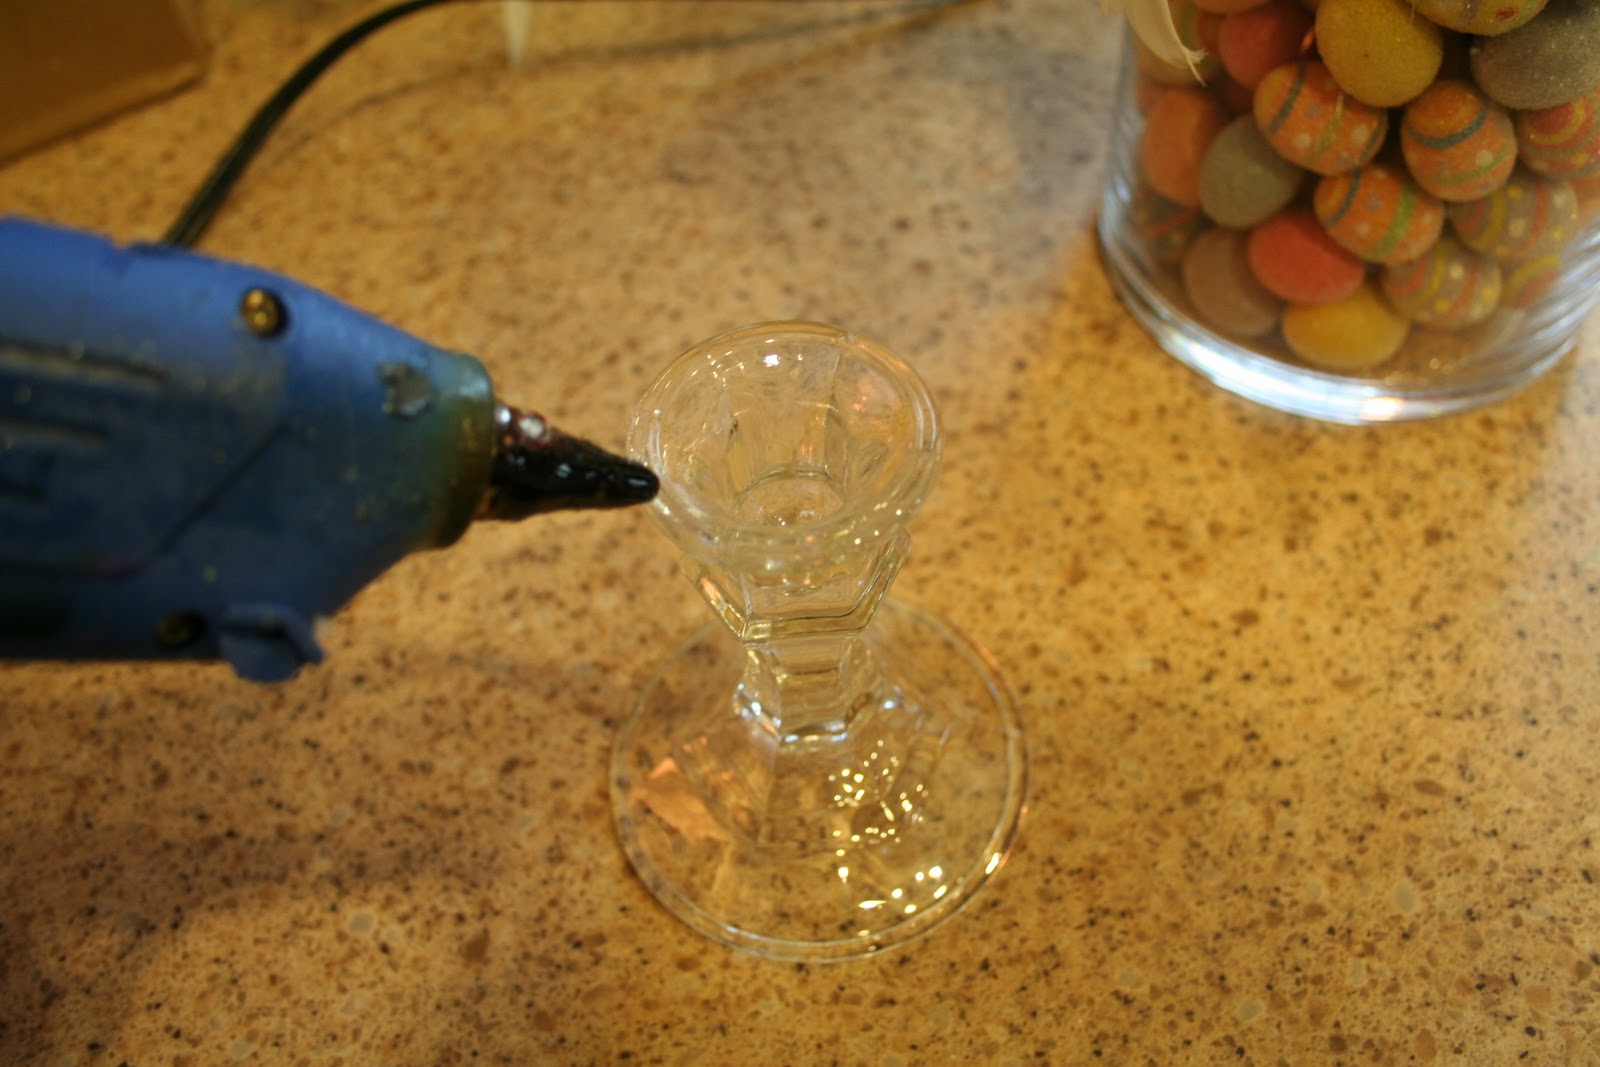
Next, you want to find a nice clear vase that you have in your stash. You can always get them at the Dollar Store. My neat trick here to save space is to put a empty toilet paper holder in the middle. This will save space and it fills the vase up faster! 
Now I wanted mine to be taller...and look cute! So, once again the Dollar Store candler holder and hot glue are calling my name! Just put a ring of hot glue on top of the candle holder and put your vase on top, in the bottom center. Don't worry, you can always separate these! Just give a gentle tug and it will come off!
  
To top them off, I have some left-over white feather boa...what? You mean to tell me that you don't have any? Don't even ask what it was from! You can always get these at the craft store too! Or you may want to add something else! 
Happy Spring! 
And there will be lot's more to come! I promise!